Create work items in Jira
10 min
Beginner
By the end of this lesson, you'll be able to:
- Create work items in Jira
- Use different types of work items to represent different work
- Use fields to capture information about your work
What are the types of work?
With a wide variety of work, teams need different ways to categorize it. The work type tells you the category and size of the tasks a work item represents.
👉 For example: The subtask work type indicates this work is just one piece of a larger deliverable.
👇 To identify a work type, hover your mouse over the work type icon.
👇 Click the tabs below to explore common work types.
An epic represents a large body of work that can break down into smaller chunks.
👉 For example: You might create an epic for a redesign of a homepage, or writing and publishing a series of blog posts.
Known as "parent" work items, epics contain smaller work items within them. You and your team can decide what's a large body of work and what isn’t.
Jira organizes these work types into a hierarchy based on the size and category of work.
👇 This is the hierarchy of the default work types.
Different work types appear in different places.
👇 Click the tabs below to see where work types appear in Jira.
Epics appear in the Epics panel of the backlog. They may also appear on your board, depending on how your team set it up.
Let's explore an example
Imagine a game design team building a space-inspired video game.
👇 Click the tabs below to see how the game design team uses work types.
One large body of work for this team is to develop and launch all character profiles. This is their epic.
This will have smaller work items within it.
Create a work item
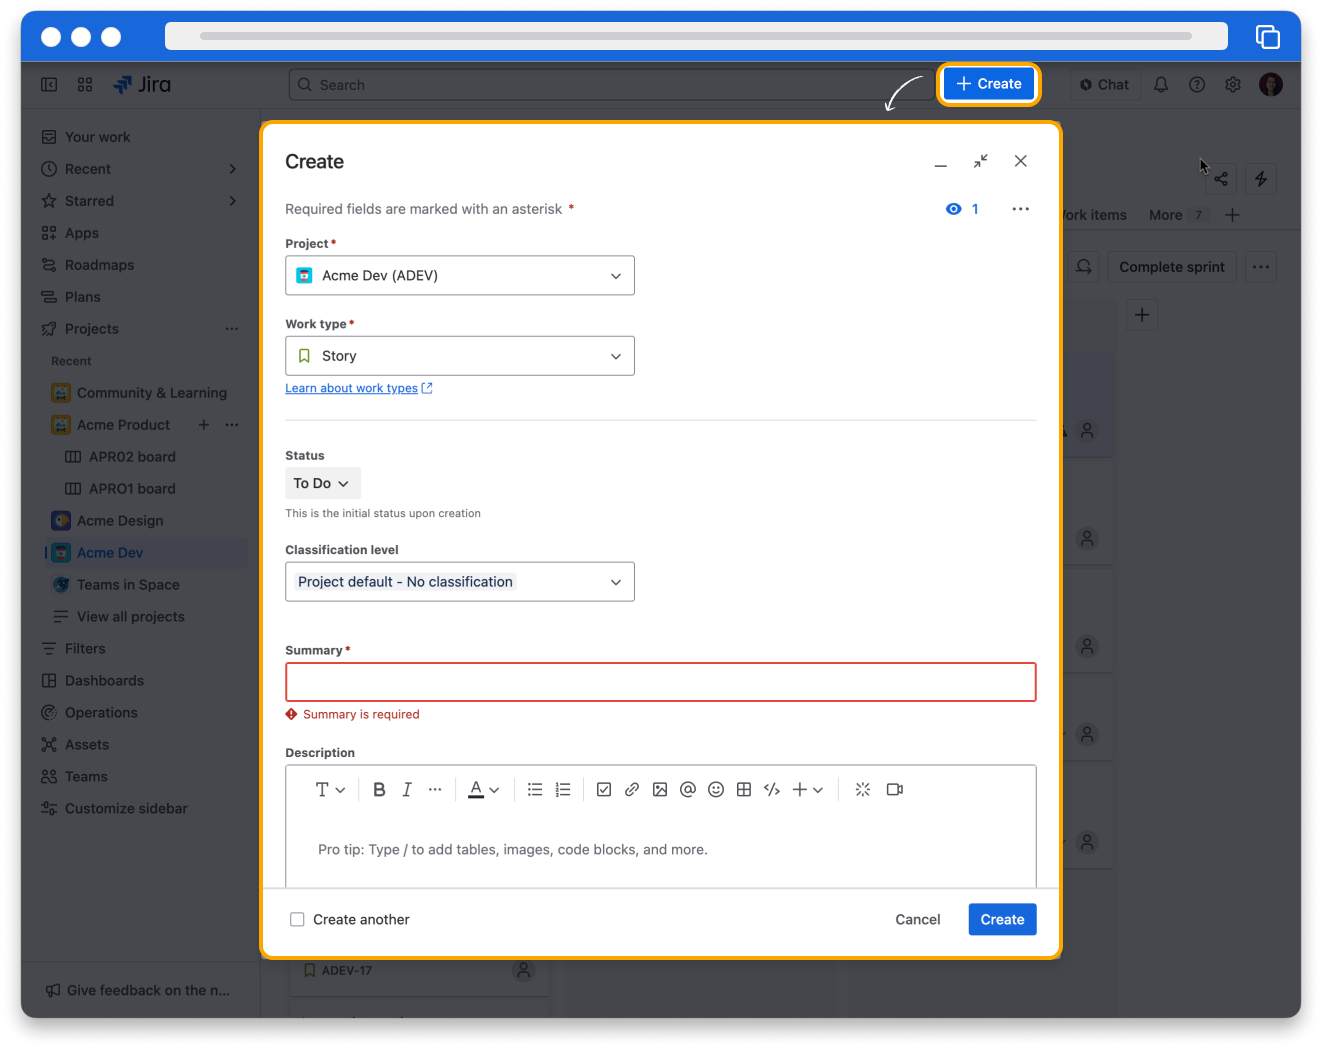
To plan and define your work, first you need to create work items! To create a work item, click the Create button in the main navigation bar or press c on your keyboard.
👇 In the main navigation bar, click Create to begin creating a new work item.
👇 Watch the video below to learn more about creating work items.
You can also create work items within other work items, like creating a story within an epic or a subtask within a task. In fact, you can only create subtasks within another work item.
👇 Subtasks appear when viewing their parent work item.
Use fields to define your work
When you create a work item, you’ll use fields to define your work. Fields contain information about a work item.
👇 Click the boxes below to learn about some important fields in Jira.
Your specific fields depend on how your team configures your project. Check with your team lead to understand which fields you should use.
Once you create a work item, you can open it to edit the fields, add comments, review the information, and track anything else you need to know about that work.
👇 To see the work item's details, just click it.

You can't edit every field. The work item key stays the same so that you always have a unique way of identifying each work item. The Created and Updated fields generate automatically based on when you created the work item or last updated it, so you can't edit them.
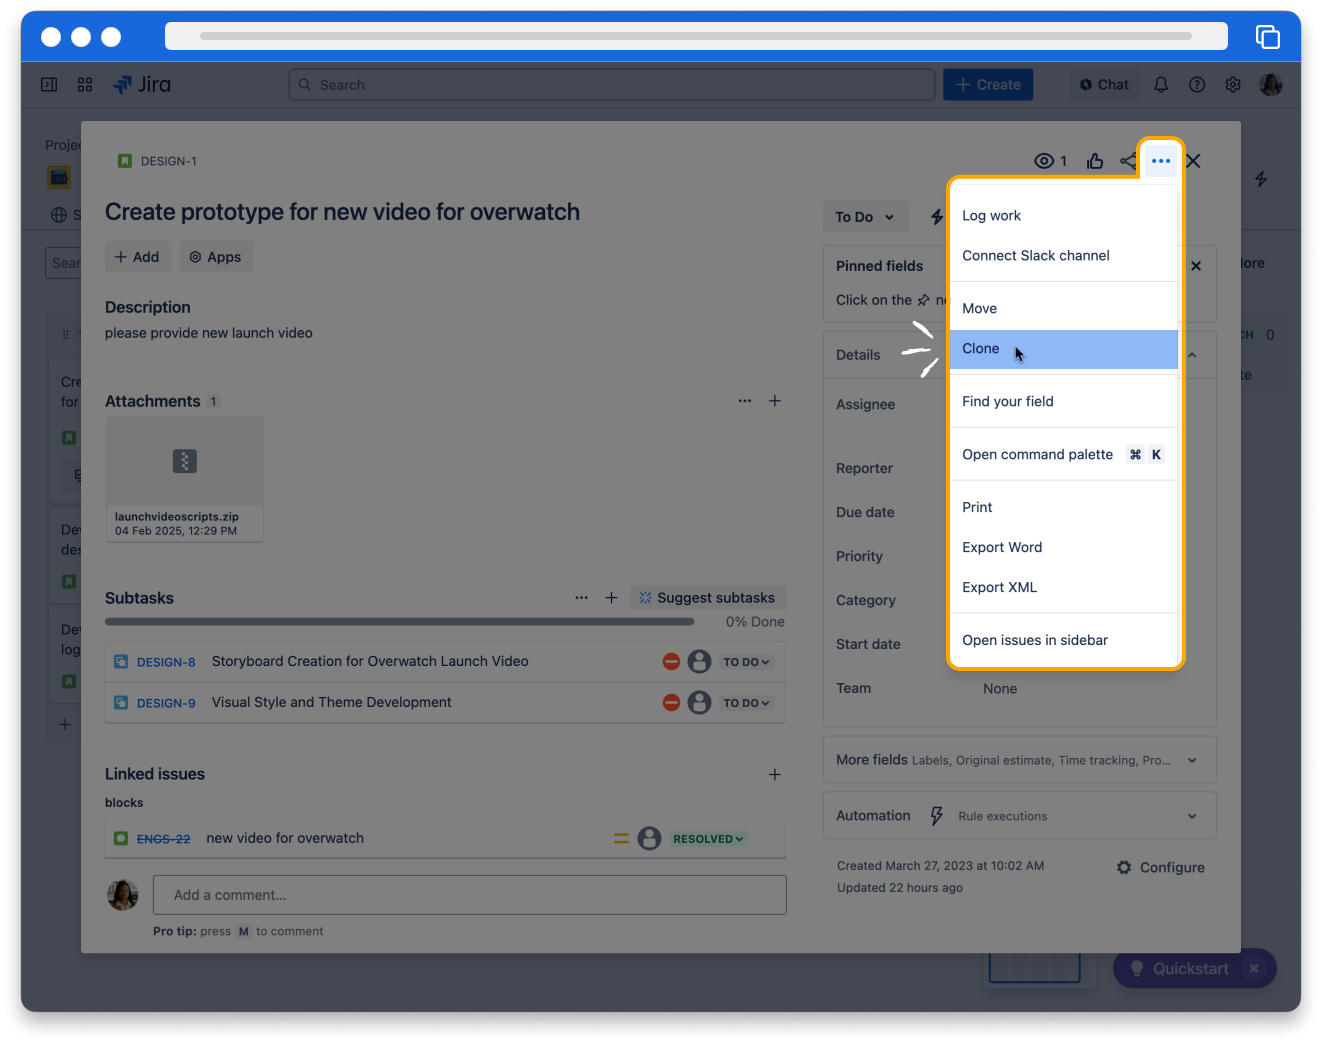
Clone a work item
If you want to create many similar work items, you can clone an existing work item.
👉 For example: Let's say you have three work items that will be assigned to you, have the same label, and have the same due date. You could create one work item and fill out the assignee, label, and due date fields. Then, clone that work item twice to create two additional work items with the same information.
To clone a work item:
- Open the work item you want to clone.
- Make sure the information you want to clone is filled out.
- In the upper-right corner, click More actions (represented by •••).
- Select Clone.
👇You can clone work items if you click to open them.
👇 Click the tabs to see what information is included when you clone a work item.
✅ Most information is cloned, including the work type, labels, assignee, and more.
How was this lesson?
next lesson
What is Jira?
- Jira helps you track your work
- How does your team use Jira?
- How can you use Jira?